

Being fatties at heart and foodies whenever the chance arises, we are huge fans of the Food Network. When we get the chance to settle down and throw on the t.v., it is our go-to channel. Just ask Ry about his dream of being on Chopped. One day…
Maybe they’ll do a strength coach edition?!
Have you ever watched a professional chef in awe as they prep their meals? They flawlessly chop, dice, and julienne their ingredients without breaking a sweat (or taking off a finger). Their efficiency is mesmerizing as their knives flow through every food as if it were all butter.
We coveted their skills. We wanted to be like them.
So we sought out a class to teach us those ninja-like knife skills. The way of the enthusiast.
With our newly acquired skill, we felt the need for all of our Sons of Strength to improve the efficiency in their food prep, increase their comfort, ease, and speed in the kitchen, and gain some confidence in making some delicious, kick-ass meals.
Time to get KitchenSTRONG. Here is a primer and our guide to developing your knife skills.
Tools for the Task.
The kitchen essentials.
-
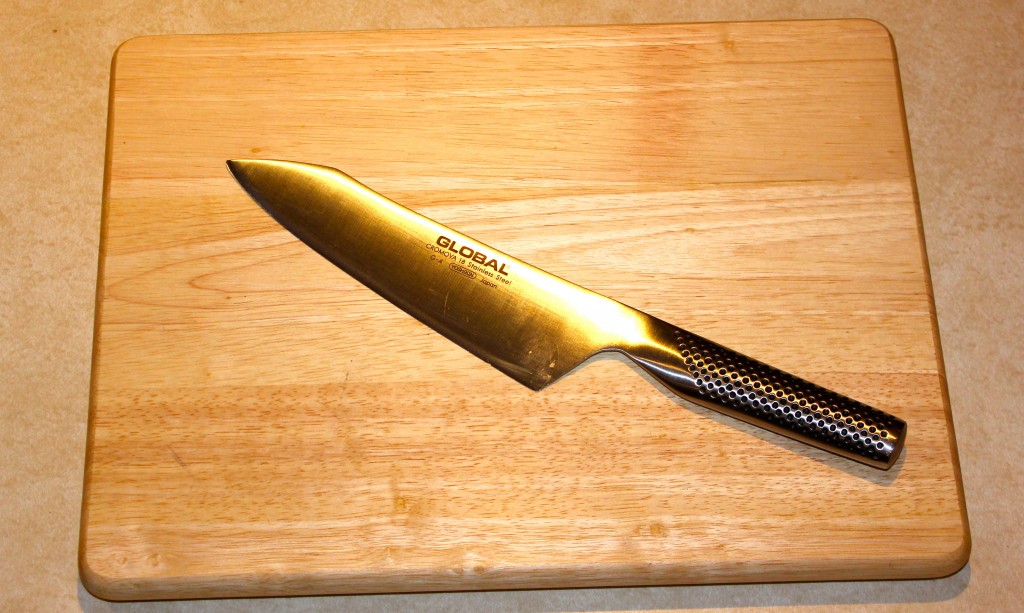
Invest a chef’s knife.
This one knife will be your bread and butter when it comes to food prep. This type of knife is curved in the belly to allow the chef to rock the knife on the cutting board for a precise slice motion.You don’t want to skimp on quality here so look at this as an investment. An 8 or 10 inch knife will serve you best.

From one of our culinary idols, Anthony Bourdain, we chose the Global Chef’s Knife. He recommends it in one of our favorite books, Kitchen Confidential. But make sure you find one that feels good and comfortable in your hand.
-
Cutting Board.
You’ll need somewhere to cut. We recommend going with a wooden or bamboo board because they won’t dull your knife as quickly as plastic. Having a plastic one on hand though will be useful in the preparation of meat, poultry, and fish. This will ensure two things. One, that you don’t cross contaminate. Two, bacteria from raw meat and fish can get trapped in the wood unlike the plastic.
Master the Basics.
- The Set Up
Before we put the knife into use, let’s be sure to set up our cutting board properly. To prevent the board from slipping, be sure to stabilize your surface. You can do this by placing a piece of nonskid rubber material underneath the board or even a damp towel will do the trick.
- Hand Placement

Now let’s get your feet wet. We want you to feel comfortable and confident with holding the knife. Start by placing your index finger and thumb on opposite sides of the blade, right in front of the handle and on top heel. (Use the diagram above as a reference.) The remaining three fingers should be loosely curled around the handle. The grip and control of the knife should come mainly from the thumb and forefinger.
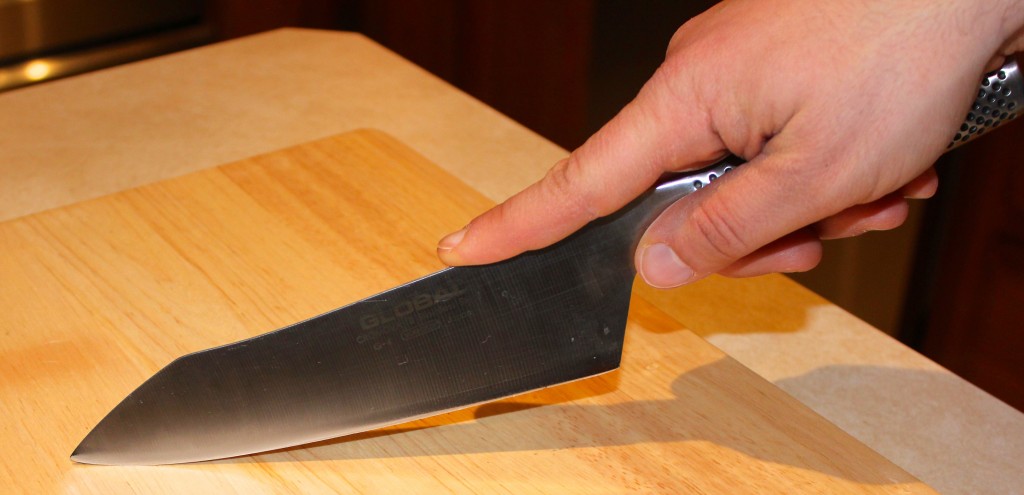
INCORRECT Hand Placement.
Easy Hulk, you don’t want to crush the handle. Instead, ease up and trust the knife to do it’s job. Never hold your index finger on the back of the knife. This will cause you to apply pressure and result in an unwanted thump sound.
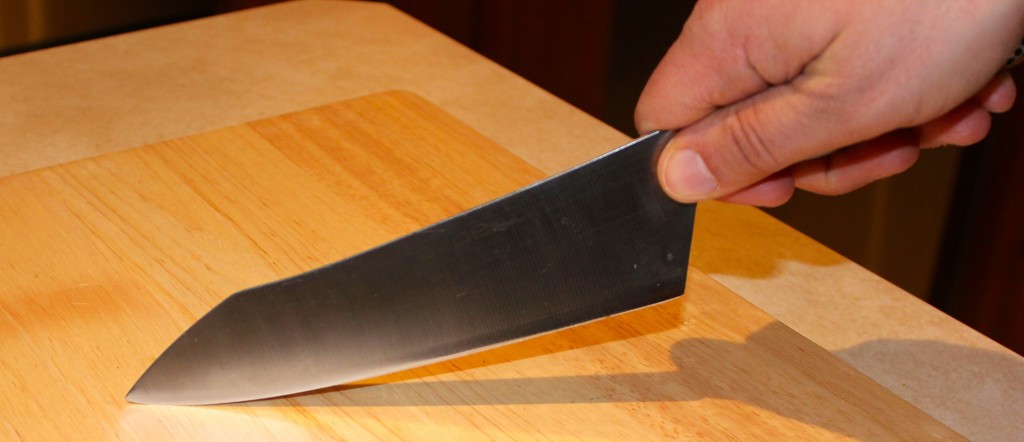
CORRECT Hand Placement.
On the opposite hand, you want to utilize the “Claw Grip” to hold the food and keep it from sliding around the cutting board. This is a dangerous position, especially to have your digits exposed. Basically, curl your fingers inward and grip the food with your fingertips. By keeping your fingertips tucked safely away, you will protect them and still be able to firmly hold the food being cut.
- The Movement
Let’s keep this simple since you will have to truly feel this for yourself. The key “coaching cue” here is to push down and forward. This allows the knife to do its work. Then after making the cut by going down and forward, you will bring the knife up and then angle it in, towards you a little bit (keeping the tip on the board). If you push straight down, you will face resistance and get a “loud chop”. This can ruin your knife over time and something we want to avoid. Pay attention to the noise your cuts make to differentiate a good and bad cut.
- The Cuts
We won’t get too in depth with all the varieties of cuts that you can utilize in your cooking. However, we must preach the importance of cutting the foods as uniformly as possible. When foods are different shapes and sizes, they will not cook evenly and can impact the meal you are preparing.
Here are three basic cuts and when to use them:
Dice
Characterized by: cube shapes (small, medium, large)
Common ingredients: vegetables, fruit, meat, and fish
Julienne
Characterized by: long, rectangular cuts
Common ingredients: vegetables for stir fry
Mince
Characterized by: very fine cut
Common ingredients: herbs, onions, garlic, and shallots
Get Schooled.
This guide is only an introduction to Knife Skills. We recommend finding a class in your town like we did. One of the rules we live by is surrounding yourself with the best at what they do. So we sought out a knife skills class voted the “Best in NYC”.
Check out this video from our instructor Brendan McDermott. He’s a stud in the kitchen and a great teacher. By the way, the chicken tagine in the video is awesome.
Practice Makes Perfect.
You will only improve your confidence, efficiency, and comfort by practicing your newly acquired skills. So we can’t preach you practicing enough. Every week you should incorporate chopping, dicing, mincing, and julienning into your meal preparation.
Here’s a perfect way to get your feet wet with a recipe for Bone Broth by Balanced Bites. This will allow you to cut a variety of vegetables, using the three different cutting techniques. And you will end up with a delicious broth that you can’t sip on for improved recovery.
Now go and be KitchenSTRONG.


Leave a Comment